How to send email with Gmail SMTP in Laravel?
Hello Artisans,
Today, I'm going to show you how to send email with Gmail SMTP in Laravel? In this tutorial you will learn how to send emails with gmail smtp server in laravel? I will show a quick and simple example to send email with smtp server.
So let's get started.
Step 1: Install New Laravel Application (optional)
It's not compulsory to install a new Laravel application if you wanna use your existing project. You can simply run the following command to install a new Laravel application.
composer create-project laravel/laravel SMTPLaravel
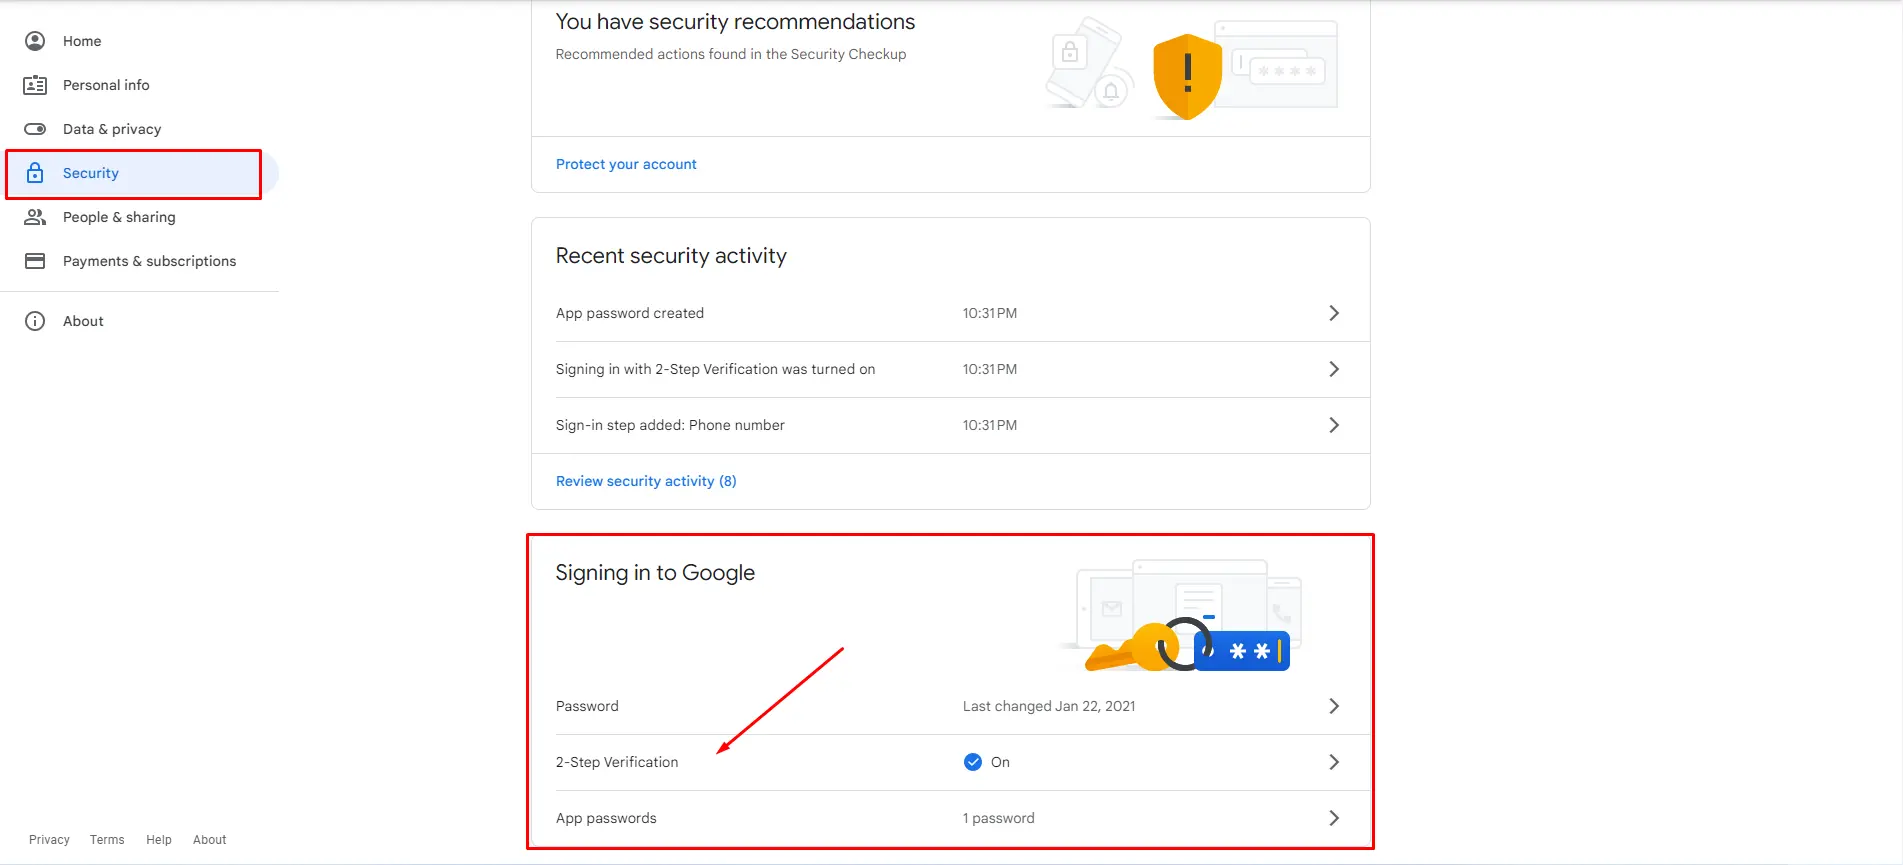
Step 2: Enable 2-Step Verification for Your Account
You have to enable 2-step verification for your account to use gmail smtp services to send email. Just follow the mentioned image.
Step 3: Generate App Password
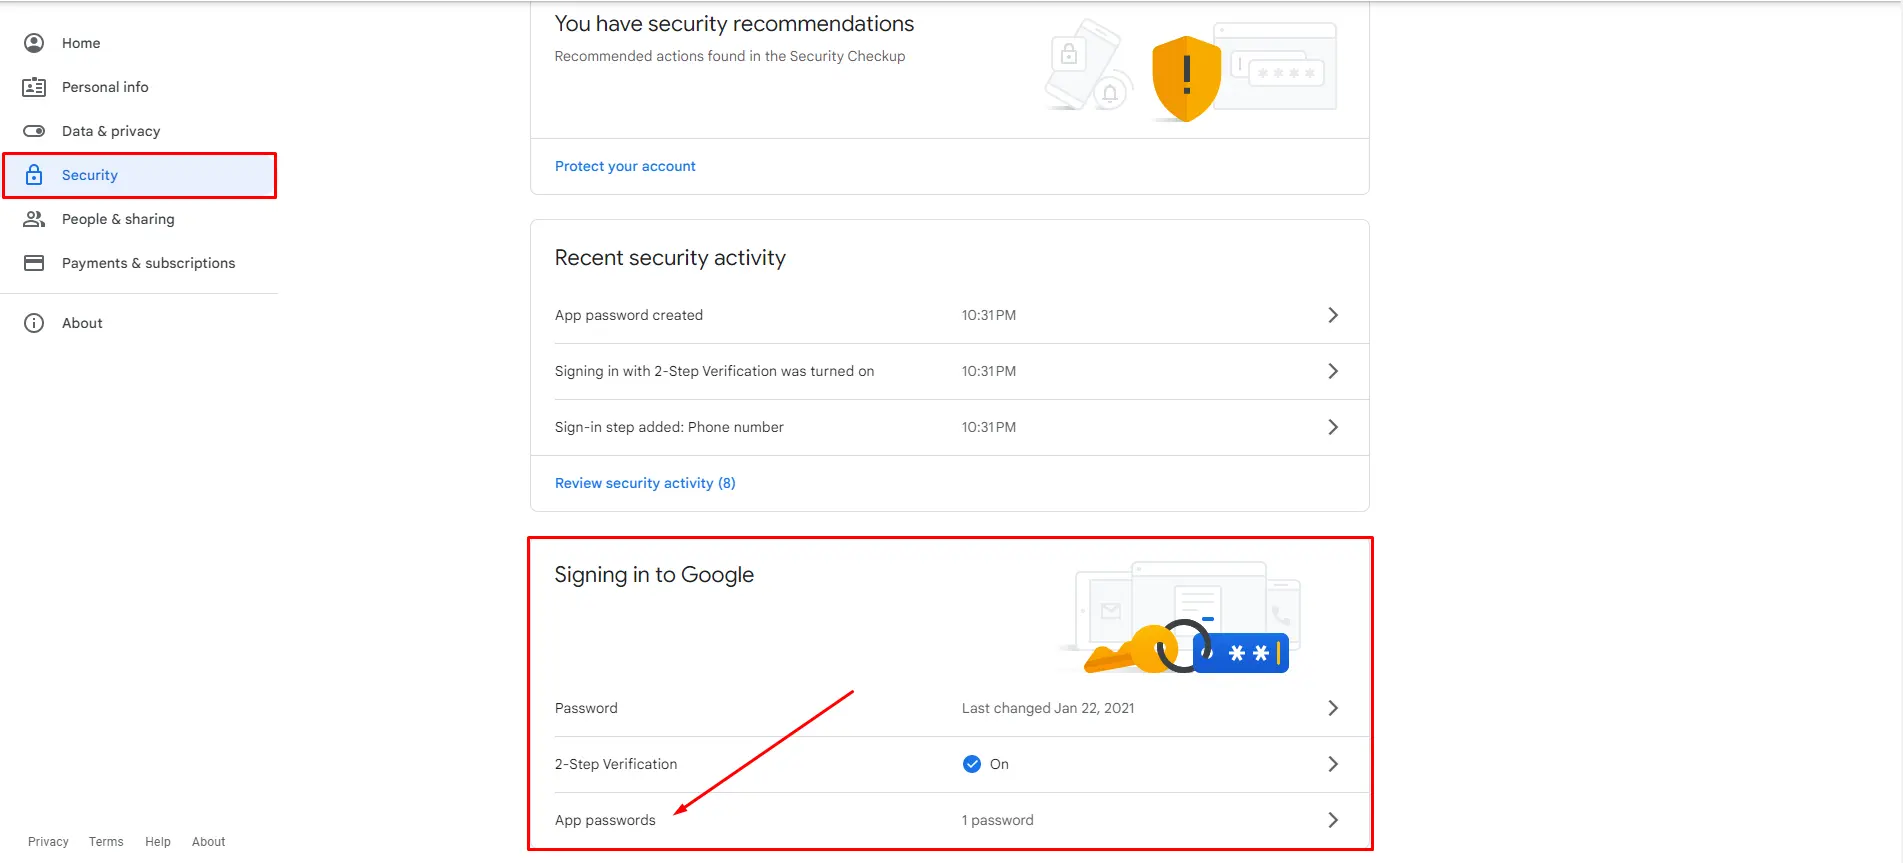
We used the “Less Secure App Access” method before, but now Google no longer supports this from May 30, 2022. You can read about it. So, you have to generate an App Password from your Google Account in security tab just after the 2-step verification option.
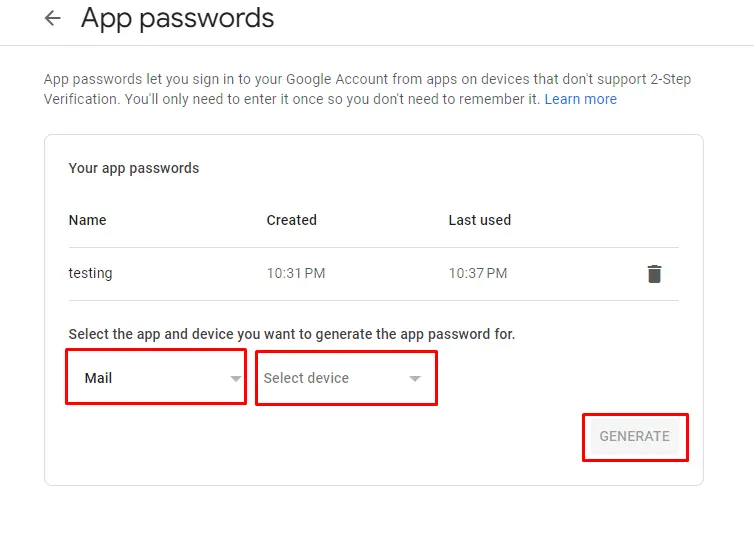
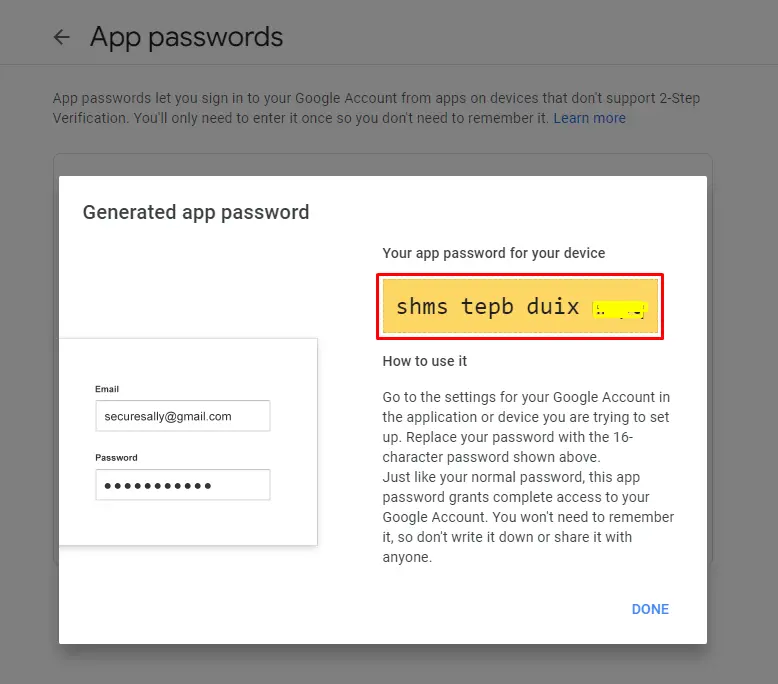
Select Mail form “Select App” list and you can select any device or add your custom name also. After selection click on the Generate button.
You will get a generated password for your app. Copy this password.
Step 4: Configure in .evn File
In this step, we will configure gmail smtp credentials in our laravel project. Open you .env file and update the mail configuration
MAIL_MAILER=smtp
MAIL_HOST=smtp.gmail.com
MAIL_PORT=465
MAIL_USERNAME=your email address
MAIL_PASSWORD=paste your newly created app password
MAIL_ENCRYPTION=ssl
MAIL_FROM_ADDRESS=from email address
MAIL_FROM_NAME="Coders Vibe"
Step 5: Create Mailable Class
Now, you have to create a mailable class in your laravel application. Simply run the following command to create the Mailable file.
php artisan make:mail MyMailUpdate newly created file with the following code.
<?php

namespace App\Mail;

use Illuminate\Bus\Queueable;
use Illuminate\Contracts\Queue\ShouldQueue;
use Illuminate\Mail\Mailable;
use Illuminate\Queue\SerializesModels;

class MyMail extends Mailable
{
    use Queueable, SerializesModels;

    public $details;

    /**
     * Create a new message instance.
     *
     * @return void
     */
    public function __construct($details)
    {
        $this->details = $details;
    }

    /**
     * Build the message.
     *
     * @return $this
     */
    public function build()
    {
        return $this->subject('Mail from Coders Vibe')
        ->view('mails.myMail');
    }
}
Step 6: Create Email Template
Create your email view file to design your email template layout which you wanna send to your users. I have added some sample layout in this file.
<!DOCTYPE html>
<html>
<head>
    <title>Codersvibe.com</title>
</head>
<body>
    <h1>{{ $details['title'] }}</h1>
    <p>{{ $details['body'] }}</p>

    <p>Thank you</p>
</body>
</html>
Step 7: Send email with Gmail SMTP
Now, you have to create a route to send an email with Gmail SMTP in your laravel application.
Route::get('send-mail', function () {

    $details = [
        'title' => 'Mail from Codersvibe.com',
        'body' => 'This is my first mail using Gmail SMTP'
    ];

    \Mail::to('[email protected]')->send(new \App\Mail\MyMail($details));

    dd("Email is Sent.");
});
Run your laravel application with the following command.
php artisan serveYour application will running start on this url:
http://127.0.0.1:8000You can send email by opening following url:
http://127.0.0.1:8000/send-mail
Conclusion
In this quick tutorial you have learned, how to send email with gmail smtp in your laravel application. At the end of this article, you have know about how can you send email with gmail smtp, how to configure your google account and generate app password. You have to follow the above mentioned steps to configure gmail smtp in your laravel application.
I hope, it will help you.
Happy Coding :)


