
How to uninstall Windows Subsystem for Linux on windows 11?
Hello Guys.
On windows 11, we can uninstall the Windows Subsystem for Linux, we must need to follow these steps to completely remove it. Removing the complete installation is not as simple as clicking the Uninstall button from the App & Features on the settings page.
If you wanna uninstall WSL completely from your computer, you need to remove the Linux distros first, uninstall the additional following components and then at the end disable the Windows Subsystem for Linux Platform. Although this is a very useful feature for developers and users who wanna access Linux on windows, sometimes when you no longer need this feature or may need to reset it to fix the issues or update it. Regardless of any condition, we can permanently uninstall WSL and its all components.
In this article, you will get the complete guide to removing the Windows Subsystem for Linux on Windows 11.
Remove all Linux distros
You need to follow these steps to uninstall a distro of Linux from WSL:
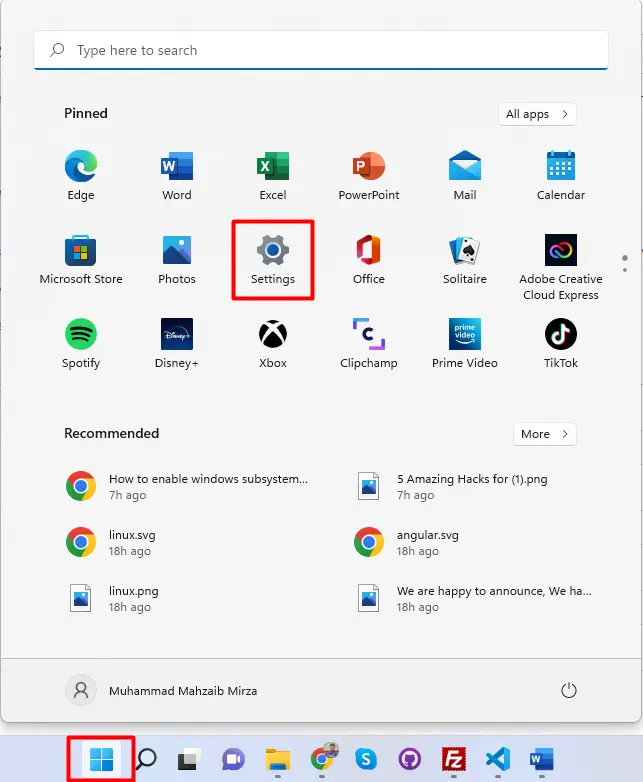
Step 1: Open Settings
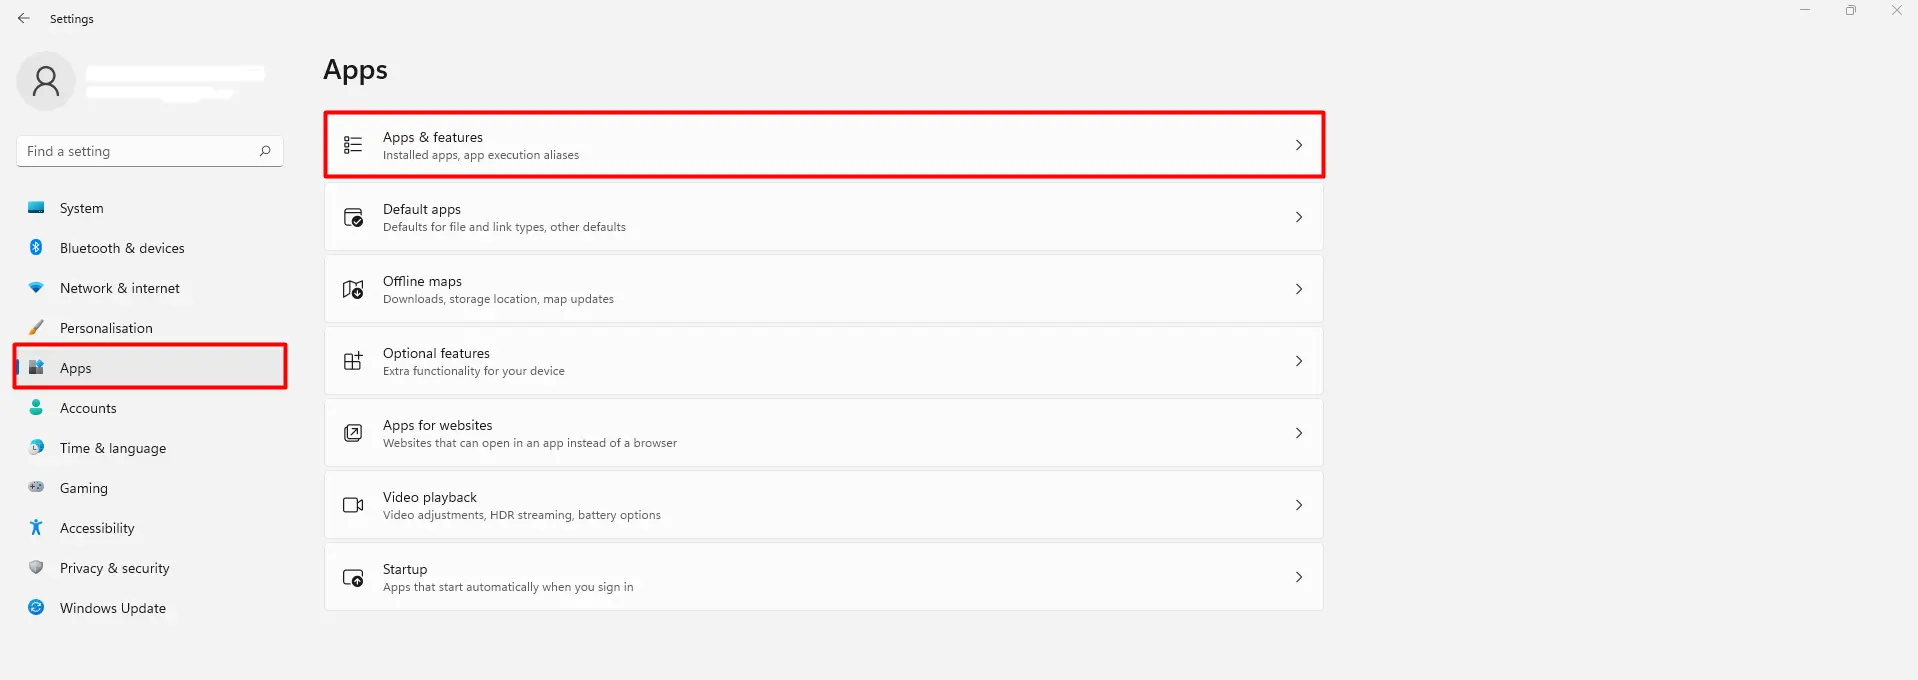
Step 2: Open Apps & Features
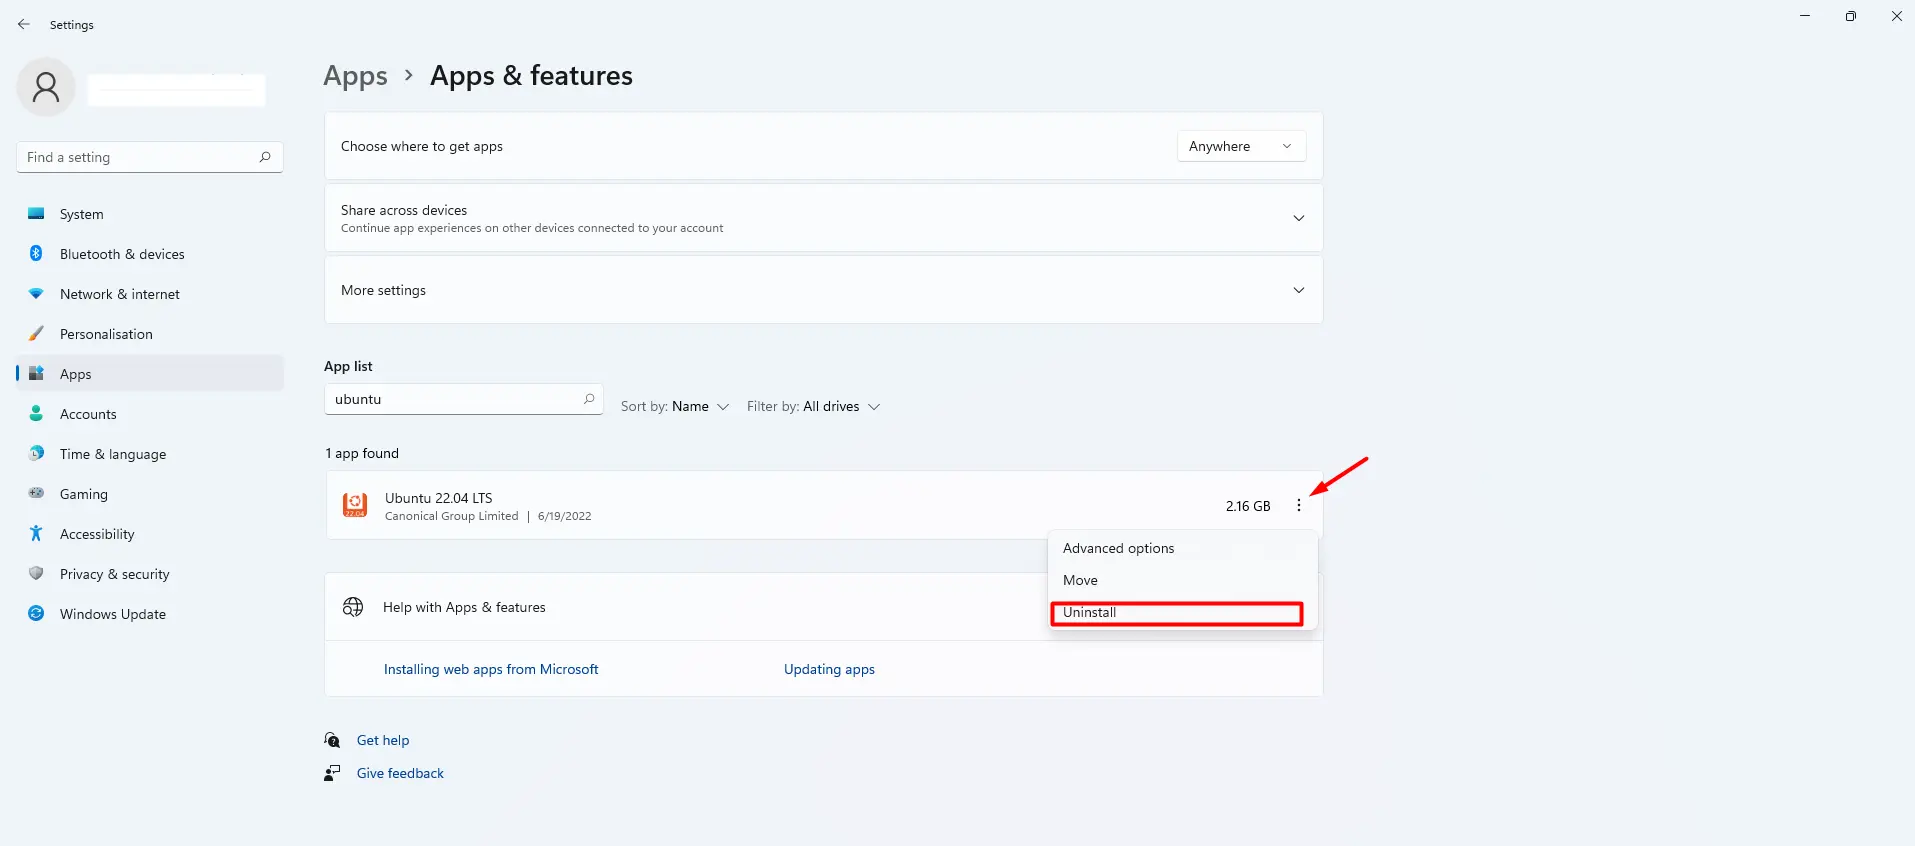
Step 3: Search for Ubuntu and Uninstall it
You can repeat the above steps to remove any remaining distro as necessary.
Remove WSL components
You need to follow the following steps to uninstall the WSL Linux kernel updates and GUI components.
Step 1: Open Settings
Step 2: Open Apps & Features
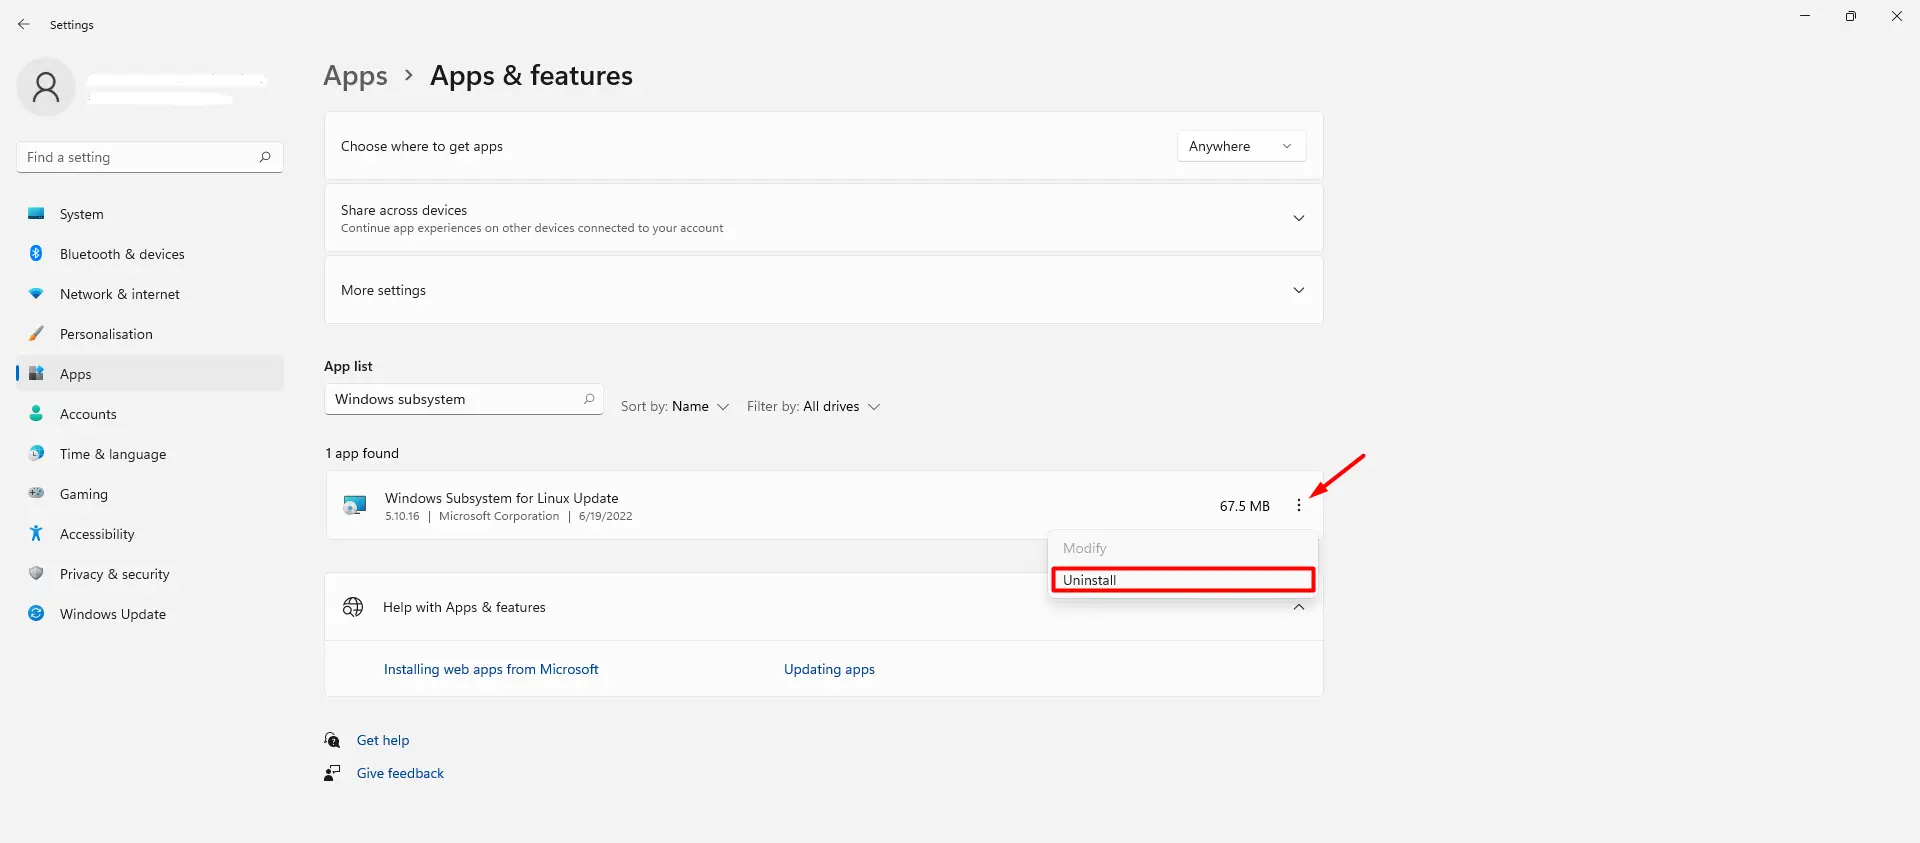
Step 3: Search for Wsl and Uninstall its all component
Now you can disable the Linux platform from Windows 11.
Disable WSL from Windows 11
Follow these steps to uninstall the windows subsystem to Linux components from windows 11.
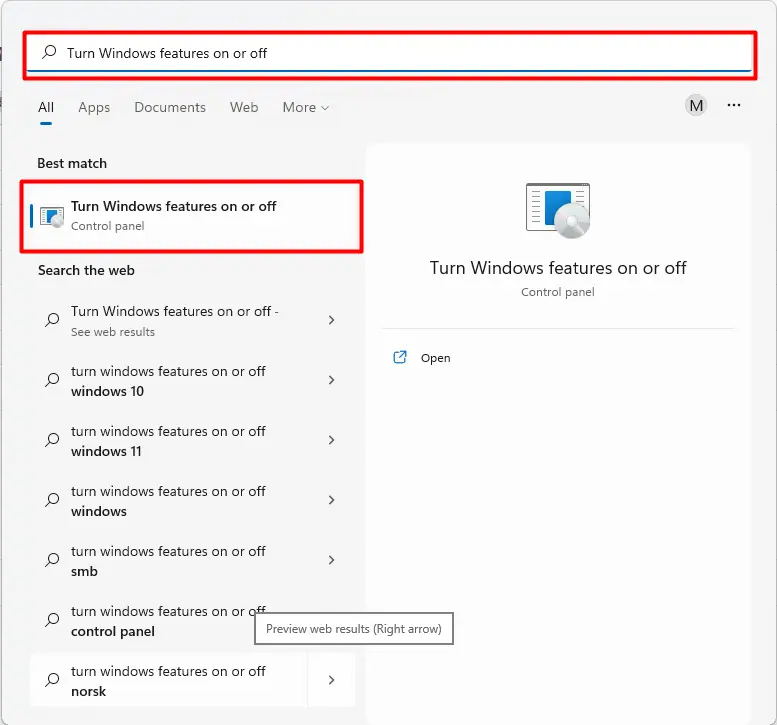
Search “Turn Windows features on and off” into the start menu
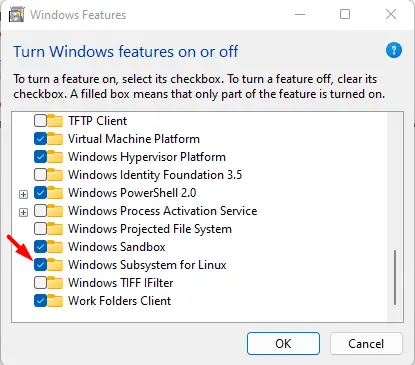
Uncheck the checkbox Windows Subsystem for Linux. and press OK.
Once you have done it, then WSL will be completely removed from your computer. You can set it up again anytime in the future by following this guide.
I hope, it will help you.
Happy Coding :)


